Nissan Rogue Service Manual: Rear washer nozzle and tube
Exploded View
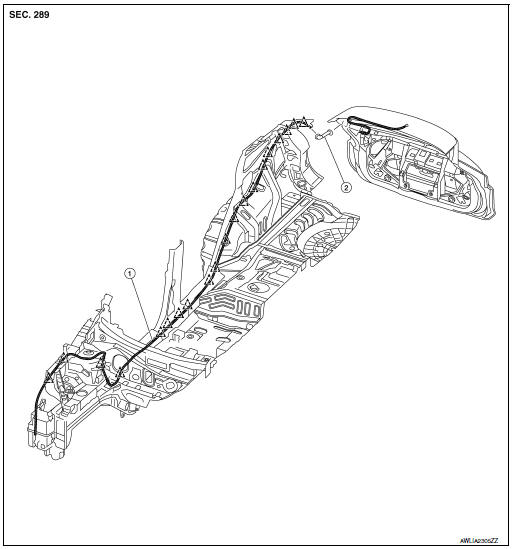
- Rear washer tube
- Rear grommet
 Clip
Clip
Removal and Installation - Rear Washer Nozzle
REMOVAL
- Remove rear access panel. Refer to INT-38, "Exploded View".
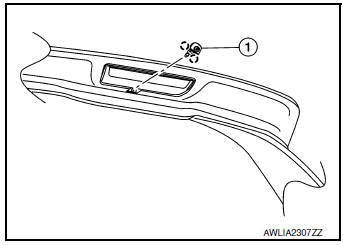
- Release pawls and remove rear washer nozzle (1).
 : Pawl
INSTALLATION
Installation in the reverse order of removal.
Removal and Installation - Rear Washer Tube
REMOVAL
- Remove engine side cover (RH). Refer to EXT-28, "FENDER PROTECTOR : Exploded View".
- Release clips and remove front air spoiler.
- Remove engine under cover. Refer to EXT-37, "ENGINE UNDER COVER : Removal and Installation".
- Partially remove fender protector (RH). Refer to EXT-37, "ENGINE UNDER COVER : Removal and Installation".
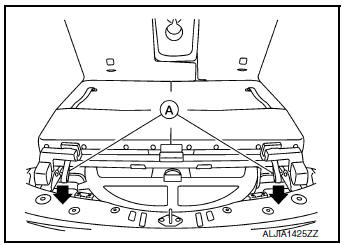
- Release seat latches by pulling straps (A) rearward, then lift seat from seat strikers (LH/RH).
- Remove dash side finisher (RH). Refer to INT-24, "DASH SIDE FINISHER : Removal and Installation".
- Remove center pillar lower finisher (RH). Refer to INT-22, "CENTER PILLAR LOWER FINISHER : Removal and Installation".
- Remove luggage rear plate. Refer to INT-37, "LUGGAGE REAR PLATE : Removal and Installation".
- Remove luggage side upper finisher (LH/RH). Refer to INT-36, "LUGGAGE SIDE UPPER FINISHER : Removal and Installation".
- Release rear clips and partially remove headliner. Refer to INT-29, "Exploded View".
- Disconnect rear washer tube from washer tank and rear washer nozzle.
- Release clips and remove rear washer tube.
INSTALLATION
Installation is in the reverse order of removal.
Inspection and Adjustment
INSPECTION
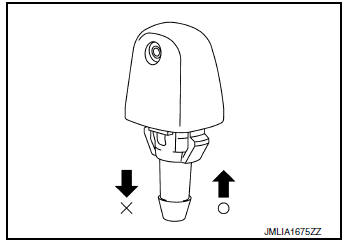
Check that air can pass through the nozzle by blowing into the nozzle and that air cannot flow in the opposite direction.
O: Air can go
X: Air cannot go
ADJUSTMENT
If operating properly, spray positions should match the positions shown. If spray positions do not match, confirm the rear washer nozzle is properly seated and working properly. If the spray positions still do not match as shown, then replace the rear washer nozzle. Refer to WW-72, "Removal and Installation - Rear Washer Nozzle"
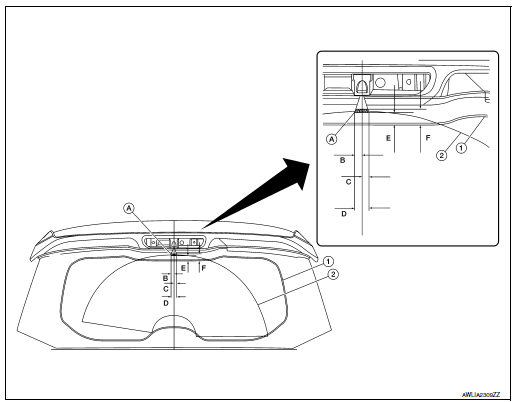
- Black print
- Wiping area
- Spray target area
- 12.8
- 12.8
- 25.7
- 15.6
- 20.6
 Rear wiper motor
Exploded View
Rear wiper motor
Back door
Rear wiper motor harness
Removal and Installation
REMOVAL
Remove rear wiper arm. Refer to WW-69, "Removal and Installation&quo ...
 Service data and specifications (sds)
Specifications
WINDSHIELD WASHER FLUID
...
Other materials:
Steering wheel turning force is heavy or light
Description
Steering wheel turning force is heavy or light.
Diagnosis Procedure
1.PERFORM SELF-DIAGNOSIS
With CONSULT
Turn the ignition switch OFF to ON.
Perform “EPS” self-diagnosis.
Is any DTC detected?
YES >> Check the DTC. Refer to STC-13, "DTC Index" ...
Power supply and ground circuit
Diagnosis Procedure
Regarding Wiring Diagram information, refer to PCS-24, "Wiring Diagram".
1. CHECK FUSE AND FUSIBLE LINKS
Check that the following IPDM E/R fuse or fusible links are not blown.
Is the fuse blown?
YES >> Replace the blown fuse or fusible link after repairin ...
Front washer nozzle and tube
Exploded View
Cowl top cover
Front washer tube
Front washer nozzle (LH)
Front washer nozzle (RH)
Pawl
Clip
Exploded View
Cowl top cover
Front washer tube
Clip
Removal and Installation - Front Washer Nozzle
REMOVAL
Remove front wiper arms (LH ...
